Quoting Wikipedia:
Animation is the rapid display of a sequence of images in order to create an illusion of movement.
There are few methods to achieve that effect in JS, and I will discuss four of them in here.
1. Canvas animation
I used canvas animation in my
Javascript game tutorial, but let's describe it once again. As an example, I will animate jump frames from my very favorite game days ago, Prince of Persia, you can find it on the right side of the post.
Before stating any animation related stuff it's necessarily to define few variables common for all four methods. Let's do this:
var width = 100,
height = 86,
frames = 10,
//our PoP jumping animation has 11 frames, but we count from 0
actualFrame = 0,
posX = 100,
posY = 100,
//X & Y position of the element
canvas = document.createElement('canvas'),
//'canvas' variable will be always main element of an animation, not always To animate our character we need just to display next frames of the jump on the canvas. It's not necessarily to clear whole surface each time in this particular case, because it has the same size as single frame. The draw function will looks like that:
var draw = function(){
    ctx.drawImage(image, 0, height * actualFrame, width, height, 0, 0, width, height);
//the attributes are: image to draw, X coord of the source image, Y coord of the source image, width & height of the cut piece (frame size), X & Y destination coords (our canvas) and destination frame size (not always the same as the source one, eg in case of scaling the frame)

    if (actualFrame == frames) {
        actualFrame = 0;
    } else {
        actualFrame++;
    }
//looping the frames, it is also the common part of all draw() function in this post
}
So that is the first method of JavaScript animation.
Pros:
- it uses canvas (the future of HTML5 games)
- it's possible to scale, rotate, flip, etc. the frames in browsers that support canvas but no CSS3
- probably much more
Cons:
- need to clear whole canvas to draw another frame
- not supported in old browsers
- quite complex math for display single frame
Life example:
[1. Canvas Animation]
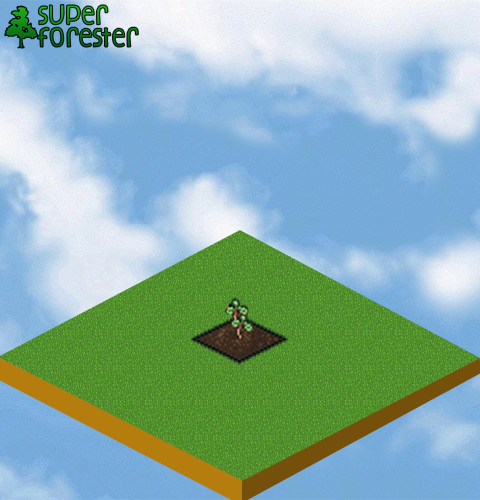
2. Background looping
I think it was one of the firstmethods of sprite's animation in web browsers. It is the simplest way ever. Just create div element with background, and change backgroundPosition on each frame. Piece of cake. Try:
var canvas = document.createElement('div'),
//div element is now our 'canvas'
    canvasStyle = canvas.style;

    canvasStyle.backgroundImage = "url(sprite.jpg)";
//and our image is just it's background
    canvasStyle.position = "absolute";
    canvasStyle.top = posX;
    canvasStyle.left = posY;

    canvasStyle.width = width;
    canvasStyle.height = height;
//width & height are now assigned to the 'style', not directly to the element
    document.body.appendChild(canvas);

var draw = function(){
    canvasStyle.backgroundPosition = "0 -"+height * actualFrame;
//each frame background image moves up, that's why there is minus sign before the value, you can multiply (height * actualFrame) by negative one, it gives the same effect
(...) //here goes frame changing logic from the 1st example
}
Pros:
- simplicity
- works everywhere
Cons:
- not possible to scale, rotate, etc. without CSS3
Example:
[2. Background looping animation]
3. Clip-rect method
Hmm, but what when we wan't our game to run on full screen, or on different devices with various resolutions? Changing size of the div from second example gives nothing, just looks ugly. So this is where I introduce
clip:rec(), Css attribute of img element. Quoting W3schools:
The clip property lets you specify the dimensions of an absolutely positioned element that should be visible, and the element is clipped into this shape.
Let's try:
var canvas = document.createElement('img'),
//image is not the canvas
    canvasStyle = canvas.style;

    canvas.src = 'sprite.jpg';
(...)//rest of the attributes
var draw = function(){
    var frameTop = height * actualFrame,
        frameLeft = 0,
        frameRight = width,
        frameBottom = frameTop + height;
//a little math here for each frame

    canvasStyle.clip = "rect("
        +frameTop +"px " //top
        +frameRight +"px " //right
        +frameBottom +"px " //bottom
        +frameLeft +"px )"; //left

    canvasStyle.top = posY - height * actualFrame;
//IMPORTANT: even if we crop piece of source image, it's top & left attrs dont change - it's necessarily to move it to the fixed position. That's what I made above.
Pros:
- only one element needed (just img)
- possibility of scaling without CSS3
- crossbrowser
Cons:
- not possible to rotate, flip, etc
- very lot of math needed on each move/frame changing.
Example:
[3. Clip-rect method]
4. Div with overflow:hidden
The last way of animation I want to present is simplest than 3rd one, better than 2nd, and doesn't use canvas. The whole philosophy is to create one div element with image inside, display only part visible in div, and move the image in proper way. Like this:
var canvas = document.createElement('div'),
    canvasStyle = canvas.style,
    image = document.createElement('img'),
    imageStyle = image.style;

    image.src = 'sprite.jpg';
//div is the 'canvas' now, but it has an image inside

    canvasStyle.position = imageStyle.position = "absolute";
    canvasStyle.top = posX;
    canvasStyle.left = posY;
    canvasStyle.overflow = "hidden";
//that is very important
    canvasStyle.width = width;
    canvasStyle.height = height;

    imageStyle.top = 0;
    imageStyle.left = 0;
    canvas.appendChild(image);
    document.body.appendChild(canvas);
//put image in the canvas/div and add it all to the body of the document.
var draw = function(){

    imageStyle.top = -1*height * actualFrame;
//as in the 3rd example - direction of the move must be negative. Otherwise animation will be played backwards
    if (actualFrame == frames) {
        actualFrame = 0;
    }
    else {
        actualFrame++;
    }

}
Pros:
- possibility of scaling without CSS3
- crossbrowser
- much simpler than clip:rect()
Cons:
- not possible to rotate, flip, etc
- two elements needed (img & div)
Example:
[4. Div with overflow:hidden]
Changing size of animated elements is very important in gamedev. So as simplicity. That's why in my new JS game engine I will implement both, canvas and overflow:hidden methods. You can find all the sources on my GitHub account: [
Javascript animation]
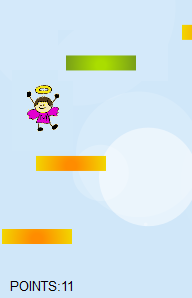
 And since learning by playing is always fun, I made a simple puzzle game that uses webcam to display realtime video on the puzzles. To run it you need Chrome Canary with Media Stream enabled.
 I create simple 'Frames per seconds' counter and run it with 100 animated sprites, each with 4 frames (actually every sprite has 8 frames, but I used only 4 of them) and random movement. The sprites were penguins drawn by me some time ago, based on


 Because physics in StH is very simple, there is no need to include any Physics Engine such as
 In the early '90, when I had my first contact with computers, I don't even heard about Cd-roms, or other freaky inventions like hard discs. I had 2 floppy stations, 3.5' and 5.25', with that 'bigger' (by size, no capacity) all the time busy with